Scrum reference card: http://scrumreferencecard.com/
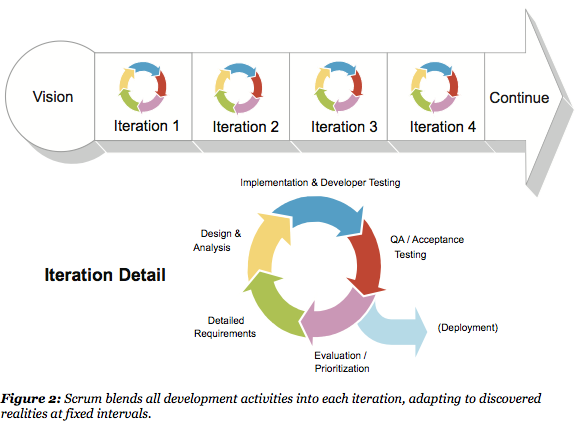
About Scrum
Iteration: Sprint (15-30 days)
Incremental: each iteration produces shippable product with increment
Scrum Roles
Product Owner
Maximizing the return on investment (ROI) of the development effort
Make the product vision, customer related
Product backlog, release plan, accept/reject increment
Scrum Development Team
Cross-functional 7-9 members
Self-organizing, self-managing, Intensely collaborative, long-term stable team
Negotiates commitments with the Product Owner
Scrum Master
Helps resolve impediments
Support team about working environment, process, meeting, promote best practice
Manage artifact, captures data
Enforce timeboxes
No management authority, no decision-making in meeting
Scrum Meetings
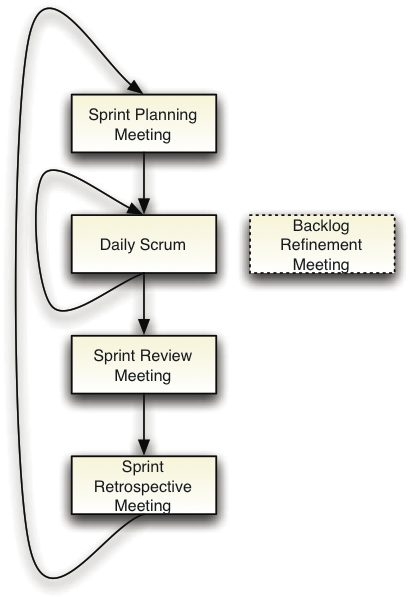
Sprint Planning Meeting
Attendees: PO + Team
Agenda:
– Select items in Product Backlog
– PO: Prioritize items
– Team: Estimate items
Output: Product Backlog Items (PBI) and sub Tasks

Daily Scrum and Sprint Execution
Period: daily
Duration: 15 mins
Agenda: What was done previous day. What is issue. What will be done today.
Attendee: Team, may be Scrum Master, PO
Sprint Review Meeting
Attendee: PO, team
Agenda:
– Live demo
– PO: Review committed items, judge Accept/Reject
– PO: Review Product Backlog
Sprint Retrospective Meeting
Attendee: team
The goals are to gain a common understanding of multiple perspectives and to develop actions that will take the team to the next level.
Backlog Refinement Meeting
Agenda:
– Team provide tech info to PO to prioritize items
– Rough estimate size of item, big items (epics) will be split into user story
Scrum Artifacts
Product Backlog: PBI
Sprint Backlog: Sprint Tasks
Sprint Burndown chart
Product Burndown chart
